Tuesday, November 29, 2022

error: package javax.xml.bind does not exist

Try these fixes if you run into issues with javax.xml.bind, which was deprecated and later removed from Java.

----------------------------------------------------------------------

Solution 1 => Switch to Java 8

Please install the latest JDK 8 from oracle for your OS - https://www.oracle.com/java/technologies/javase/javase-jdk8-downloads.html. If you have the latest Java (version 11/14) installed, you need to also install JDK 8 and use it to run the java code.

Switch to JDK 8 on Linux / macOS:

- Check current java version % java --version, if it is JDK 11/14 then install JDK 8

- Check all JDK versions installed % /usr/libexec/java_home -V

- Edit bash profile % nano ~/.bash_profile

export JAVA_HOME_8=$(/usr/libexec/java_home -v1.8)

export JAVA_HOME_11=$(/usr/libexec/java_home -v11)

export JAVA_HOME_14=$(/usr/libexec/java_home -v14)

Sunday, November 27, 2022

[Fix] Free up disk space in macOS


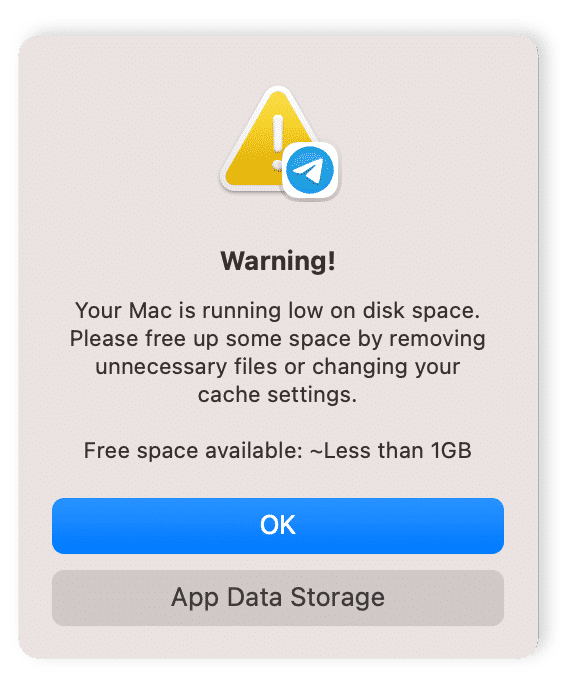
This hack worked for me when I was running low on disk space on my MacBook Pro, stopping me from upgrading to the latest version of Xcode and macOS. Run these quick and easy commands from the macOS terminal to clean system data over 100 GB.
  • rm -rf Library/Logs
  • rm -rf Library/Caches
  • rm -rf System/Library/Caches
  • rm -rf ~/Library/Logs
  • rm -rf ~/Library/Caches

List Supported CPU Instructions Set [Solved]

You may find these terminal commands useful if you are looking for ways to list all supported instructions set by the CPU on a macOS machine. For instance, you can check for Intel® Streaming SIMD Extensions 4 (Intel® SSE4) or Intel® Software Guard Extensions (Intel® SGX) features for your device.

% sysctl -n "machdep.cpu.brand_string"

Intel(R) Core(TM) i5-8279U CPU @ 2.40GHz


% sysctl -a | grep machdep.cpu.features

machdep.cpu.features: FPU VME DE PSE TSC MSR PAE MCE CX8 APIC SEP MTRR PGE MCA CMOV PAT PSE36 CLFSH DS ACPI MMX FXSR SSE SSE2 SS HTT TM PBE SSE3 PCLMULQDQ DTES64 MON DSCPL VMX EST TM2 SSSE3 FMA CX16 TPR PDCM SSE4.1 SSE4.2 x2APIC MOVBE POPCNT AES PCID XSAVE OSXSAVE SEGLIM64 TSCTMR AVX1.0 RDRAND F16C


% sysctl -a | grep machdep.cpu.leaf7_features


machdep.cpu.leaf7_features: RDWRFSGS TSC_THREAD_OFFSET SGX BMI1 AVX2 SMEP BMI2 ERMS INVPCID FPU_CSDS MPX RDSEED ADX SMAP CLFSOPT IPT MDCLEAR TSXFA IBRS STIBP L1DF ACAPMSR SSBD


% sysctl -a | grep AVX2


machdep.cpu.leaf7_features: RDWRFSGS TSC_THREAD_OFFSET SGX BMI1 AVX2 SMEP BMI2 ERMS INVPCID FPU_CSDS MPX RDSEED ADX SMAP CLFSOPT IPT MDCLEAR TSXFA IBRS STIBP L1DF ACAPMSR SSBD


Delete files from Git repo and history


Follow these steps to delete single or multiple files from your Git repository and prune it from history. You should also add the file(s) to .gitignore (Step 5) to avoid committing the same files to your repo again in the future.
  1. git clone <repo-path>
  2. git rm file1 file2
  3. git filter-repo --force --invert-paths --path file1
  4. git filter-repo --force --invert-paths --path file2
  5. nano .gitignore 
  6. git add .
  7. git commit -m "deleted file1 file2"
  8. git remote add origin <repo-path>
  9. git remote -v
  10. git push origin --force --all
  11. git push origin --force --tags

[How To] Install HElib on macOS


HElib is an open-source (Apache License v2.0) software library that implements homomorphic encryption (HE). Currently, available schemes are the implementations of the Brakerski-Gentry-Vaikuntanathan (BGV) scheme and the Approximate Number scheme of Cheon-Kim-Kim-Song (CKKS), along with many optimizations to make homomorphic evaluation runs faster, focusing mostly on effective use of the Smart-Vercauteren ciphertext packing techniques and the Gentry-Halevi-Smart optimizations. To install HElib on macOS, follow these steps:

Cloning into 'HElib'...

remote: Enumerating objects: 14133, done.

remote: Counting objects: 100% (292/292), done.

remote: Compressing objects: 100% (211/211), done.

remote: Total 14133 (delta 127), reused 172 (delta 54), pack-reused 13841

Receiving objects: 100% (14133/14133), 13.04 MiB | 5.81 MiB/s, done.

Resolving deltas: 100% (10853/10853), done.

  • cd HElib/

  • mkdir build

  • cd build 

  • cmake -DPACKAGE_BUILD=ON -DENABLE_TEST=ON ..

-- The C compiler identification is AppleClang 14.0.0.14000029

-- The CXX compiler identification is AppleClang 14.0.0.14000029

-- Detecting C compiler ABI info

-- Detecting C compiler ABI info - done

-- Check for working C compiler: /Library/Developer/CommandLineTools/usr/bin/cc - skipped

-- Detecting C compile features

-- Detecting C compile features - done

-- Detecting CXX compiler ABI info

-- Detecting CXX compiler ABI info - done

-- Check for working CXX compiler: /Library/Developer/CommandLineTools/usr/bin/c++ - skipped

-- Detecting CXX compile features

-- Detecting CXX compile features - done

-- Performing Test CMAKE_HAVE_LIBC_PTHREAD

-- Performing Test CMAKE_HAVE_LIBC_PTHREAD - Success

-- Found Threads: TRUE  

CMake Warning at CMakeLists.txt:264 (message):

  CAUTION: Package build should not be installed globally as it will

  potentially override dependencies.


Thursday, November 24, 2022

[How To] Run Jupyter Lab from a Remote server

Step 1: Launch Jupyter Lab from the Remote server with the command

$ jupyter-lab --no-browser --ip="0.0.0.0"

[I 2022-11-24 15:03:36.648 ServerApp] jupyterlab | extension was successfully linked.
[I 2022-11-24 15:03:36.711 ServerApp] nbclassic | extension was successfully linked.
[I 2022-11-24 15:03:37.783 ServerApp] notebook_shim | extension was successfully linked.
[I 2022-11-24 15:03:37.910 ServerApp] notebook_shim | extension was successfully loaded.
[I 2022-11-24 15:03:37.917 LabApp] JupyterLab extension loaded from /home/pi/.local/lib/python3.9/site-packages/jupyterlab
[I 2022-11-24 15:03:37.917 LabApp] JupyterLab application directory is /home/pi/.local/share/jupyter/lab
[I 2022-11-24 15:03:37.941 ServerApp] jupyterlab | extension was successfully loaded.
[I 2022-11-24 15:03:37.963 ServerApp] nbclassic | extension was successfully loaded.
[I 2022-11-24 15:03:37.965 ServerApp] Serving notebooks from local directory: /home/pi/Documents


Step 2: Open a browser window from your local machine and type Remote server's IP and Port


Step 3: Enter the session token


Step 4: You are connected!!

[How To] Install SEAL Python on a Raspberry Pi


Follow this tutorial to install Microsoft SEAL 4.X for Python on a Raspberry Pi 3 device. You can follow the same commands to install it on any other Linux machine. I have copied the output for each command for your reference.

$ uname -a
Linux raspberrypi 5.15.76-v7+ #1597 SMP Fri Nov 4 12:13:17 GMT 2022 armv7l GNU/Linux

$ sudo apt update -y && sudo apt upgrade -y && sudo apt autoremove
Reading package lists... Done
Building dependency tree... Done
Reading state information... Done
0 upgraded, 0 newly installed, 0 to remove and 0 not upgraded.

$ sudo apt-get install git build-essential cmake python3 python3-dev python3-pip
Reading package lists... Done
Building dependency tree... Done
Reading state information... Done
build-essential is already the newest version (12.9).
git is already the newest version (1:2.30.2-1).
python3 is already the newest version (3.9.2-3).
python3-dev is already the newest version (3.9.2-3).
python3-dev set to manually installed.
cmake is already the newest version (3.18.4-2+rpt1+rpi1+deb11u1).
python3-pip is already the newest version (20.3.4-4+rpt1+deb11u1).
0 upgraded, 0 newly installed, 0 to remove and 0 not upgraded.

Cloning into 'SEAL-Python'...
remote: Enumerating objects: 1623, done.
remote: Counting objects: 100% (247/247), done.
remote: Compressing objects: 100% (82/82), done.
remote: Total 1623 (delta 174), reused 188 (delta 161), pack-reused 1376
Receiving objects: 100% (1623/1623), 8.68 MiB | 7.14 MiB/s, done.
Resolving deltas: 100% (880/880), done.

$ cd SEAL-Python

Tuesday, August 09, 2022

[Solved] Error: No such keg: /usr/local/Cellar/gcc


If you are facing issues with Homebrew while installing or updating the GCC package (or any other module), follow this guide.

The error occurred for me recently during my periodic homebrew updates on my MacBook Pro.

devharsh@Devharshs-MacBook-Pro ~ % brew update && brew upgrade && brew cleanup                                                         

Already up-to-date.

Warning: Skipping gcc: most recent version 12.1.0 not installed


For some reason, I had a warning flashing up for GCC. So I tried to install the missing version.

devharsh@Devharshs-MacBook-Pro ~ % brew install -f gcc@12

Error: gcc 12.1.0_1 is already installed

To install 12.1.0, first run:

  brew unlink gcc


Which unsurprisingly did not work, so I tried unlinking it. 

devharsh@Devharshs-MacBook-Pro ~ % brew unlink gcc

Error: No such keg: /usr/local/Cellar/gcc


And this failed too, hence this post! After some troubleshooting, I could fix the issue.

[How To] Upgrade to Python 3.9 in Google Colab


Google Colaboratory, or “Colab” for short, is a product from Google Research. Colab allows anybody to write and execute arbitrary python code through the browser and is especially well suited to machine learning, data analysis, and education. More technically, Colab is a hosted Jupyter notebook service that requires no setup to use while providing access free of charge to computing resources, including GPUs.

By default, it starts the runtime with Python version 3.7. If you want to upgrade the version in your current notebook, then follow these steps in the given order:

1) !python --version
Python 3.7.13

2) !sudo apt-get update -y
Get:1 http://ppa.launchpad.net/c2d4u.team/c2d4u4.0+/ubuntu bionic InRelease [15.9 kB]
Hit:2 http://ppa.launchpad.net/cran/libgit2/ubuntu bionic InRelease
Get:3 https://cloud.r-project.org/bin/linux/ubuntu bionic-cran40/ InRelease [3,626 B]
Get:4 http://ppa.launchpad.net/deadsnakes/ppa/ubuntu bionic InRelease [15.9 kB]
Hit:5 http://ppa.launchpad.net/graphics-drivers/ppa/ubuntu bionic InRelease
Get:6 http://security.ubuntu.com/ubuntu bionic-security InRelease [88.7 kB]
Hit:7 http://archive.ubuntu.com/ubuntu bionic InRelease
Get:8 http://archive.ubuntu.com/ubuntu bionic-updates InRelease [88.7 kB]
Get:9 http://ppa.launchpad.net/c2d4u.team/c2d4u4.0+/ubuntu bionic/main Sources [2,077 kB]
Ign:10 https://developer.download.nvidia.com/compute/machine-learning/repos/ubuntu1804/x86_64  InRelease
Get:11 https://developer.download.nvidia.com/compute/cuda/repos/ubuntu1804/x86_64  InRelease [1,581 B]
Hit:12 https://developer.download.nvidia.com/compute/machine-learning/repos/ubuntu1804/x86_64  Release
Get:13 http://ppa.launchpad.net/c2d4u.team/c2d4u4.0+/ubuntu bionic/main amd64 Packages [1,064 kB]
Get:14 http://archive.ubuntu.com/ubuntu bionic-backports InRelease [74.6 kB]
Get:15 http://ppa.launchpad.net/deadsnakes/ppa/ubuntu bionic/main amd64 Packages [45.3 kB]
Get:16 https://developer.download.nvidia.com/compute/cuda/repos/ubuntu1804/x86_64  Packages [902 kB]
Get:18 http://security.ubuntu.com/ubuntu bionic-security/main amd64 Packages [2,905 kB]
Get:19 http://archive.ubuntu.com/ubuntu bionic-updates/universe amd64 Packages [2,306 kB]
Get:20 http://archive.ubuntu.com/ubuntu bionic-updates/main amd64 Packages [3,336 kB]
Get:21 http://security.ubuntu.com/ubuntu bionic-security/universe amd64 Packages [1,528 kB]
Fetched 14.5 MB in 9s (1,578 kB/s)
Reading package lists... Done

Sunday, July 17, 2022

[How To] Install Pyfhel in macOS


  • Tested on Intel-based (x86_64) MacBook, not tested on M1/M2 (ARM)
  • Apple Clang does not support -fopenmp and -libseal, use GCC or CLANG
  1. % git clone --recursive https://github.com/ibarrond/Pyfhel

2.a) create requirements.txt file

  "setuptools<=60.9",
  "wheel",
  "cython>=3.0.0a9",
  "numpy>=1.20",
  "cmake>=3.15",
  "toml>=0.10"

2.b) % pip3 install -r requirements.txt

  1. edit pyproject.toml

Line #111 [Afhel]

extra_compile_args

  • {Darwin = ["-std=c++17","-O3","-fopenmp"]},

extra_link_args

  • {Darwin = ["-fopenmp","-dynamiclib"]},

Repeat the above for [CYTHON EXTENSIONS]

Wednesday, July 13, 2022

[Solved] Jupyter notebook raises Module Not Found Error

I recently ran into issues on my MacBook with Jupyter notebooks, where it could not find any packages and was throwing "ModuleNotFoundError: No module named ****" for several libraries. I already had these packages installed but somehow Jupyter python kernel could not find it. I tried to install these packages in the notebook cells with the command !pip install **** but this did not help either. I also tried %brew reinstall jupyterlab and that did not work as well.

Finally, I found a fix.

Solution:

Step-1: Install/upgrade jupyter packages:

% pip3 install --upgrade jupyter notebook jupyterlab

Step-2: Run jupyter with this command:

% jupyter-lab

[Solved] ld: library not found for -lntl

NTL: A Library for doing Number Theory

NTL is a high-performance, portable C++ library providing data structures and algorithms for manipulating signed, arbitrary length integers and for vectors, matrices, and polynomials over the integers and over finite fields.

You might face a linking error with NTL in macOS using the Apple Clang compiler:

% make                               

Consolidate compiler generated dependencies of target degrees

[ 25%] Linking CXX executable degrees

ld: library not found for -lntl

clang: error: linker command failed with exit code 1 (use -v to see invocation)


Solution:

% brew install NTL
% export LIBRARY_PATH=/usr/local/lib
% make

[How To] Run MinimaxComp_degrees in macOS


MinimaxComp_degrees

This algorithm finds optimized degrees for comparison/max/ReLU algorithms using minimax composite polynomial on the RNS-CKKS scheme, which was proposed in https://ieeexplore.ieee.org/document/9517029 and https://eprint.iacr.org/2021/1215.

How to run on macOS using the Apple Clang compiler:

1. % brew install NTL
2. % export LIBRARY_PATH=/usr/local/lib
4. % cd MinimaxComp_degrees
5. % cmake -S . -B build
6. % cd build
7. % make
8. % ./degrees

Output:

------------------------------------

alpha: 20

epsilon: 0.2002716064453125e-4

mintime: 162

depth: 22

0.39825903512705770933e-4

7 13 15 15 59 


Friday, July 08, 2022

[How To] Install CRC RevEng on macOS

CRC RevEng

CRC RevEng is a portable, arbitrary-precision CRC calculator and algorithm finder. It calculates CRCs using any 111 preset algorithms or a user-specified algorithm to any width. It calculates reversed CRCs to give the bit pattern that produces a desired forward CRC. CRC RevEng also reverse-engineers any CRC algorithm from good, correctly formatted message-CRC pairs and optional known parameters. It comprises powerful input interpretation options.

Installation instructions for macOS:

1. Download reveng from SourceForge: https://sourceforge.net/projects/reveng/files/

2. Unzip the downloaded reveng zip file

3. % cd Downloads/reveng-3.0.3


4. % make


gcc -O3 -Wall -ansi -fomit-frame-pointer -DPRESETS -DBMPTST -o bmptst bmpbit.c

( ./bmptst && touch bmptst ) || ( rm bmptst bmptst.exe && false )

reveng: configuration fault.  Update config.h with these definitions and recompile:

#define BMP_BIT   64

#define BMP_SUB   32

rm: bmptst.exe: No such file or directory

make: *** [bmptst] Error 1

Top 13 Free Email Newsletters

Saturday, July 02, 2022

[Solved] frame.append method is deprecated and will be removed from pandas


Code:

all_results = all_results.append(current_result)


Error:

/var/folders/wh/tdg0ff9s1wl59234d5l27_gc0000gn/T/ipykernel_98654/2691205834.py:15: FutureWarning: The frame.append method is deprecated and will be removed from pandas in a future version. Use pandas.concat instead.
  all_results = all_results.append(current_result)


Fix:

all_results = pd.concat([all_results, current_result])

[Solved] seaborn: decrease the size of the markers


Code:

ax = sns.swarmplot(y="time_taken", x="dtype", data=all_results, color=".25")


Error:

/usr/local/Cellar/jupyterlab/3.3.2/libexec/lib/python3.9/site-packages/seaborn/categorical.py:1296: UserWarning: 35.9% of the points cannot be placed; you may want to decrease the size of the markers or use stripplot.
  warnings.warn(msg, UserWarning)


Fix:

ax = sns.swarmplot(y="time_taken", x="dtype", data=all_results, color=".25", size=3.25)

Thursday, June 30, 2022

[How To] Run HELR (Homomorphic Encryption Logistic Regression) in macOS


HELR is a software project for performing a logistic regression training on encrypted data (Secure Logistic Regression based on Homomorphic Encryption: Design and Evaluation (https://medinform.jmir.org/2018/2/e19/)).


Step 1: brew install GMP

Step 2: brew install NTL

Step 4: cd HELR

Thursday, June 16, 2022

[How To] Print with staples in macOS

Step 1/3: If you have opened a PDF from Google Chrome, go to the Print dialogue box and click on the link "Print using system dialog.."

Step 2/3: Click on the dropdown menu that says "Media & Quality" and change it to "Finishing Options"

Step 3/3: Click on Staple dropdown options and select the number of staples and the orientation where you want the pages to be stapled.

Monday, June 13, 2022

[Solved] Install matplotlib / basemap in macOS

I have been trying to import the basemap module in my python script using "
from mpl_toolkits.basemap import Basemap" but with no luck! I ran into issues while installing basemap with pip. Excerpt from the error:

  Installing build dependencies ... error

  errorsubprocess-exited-with-error


  × pip subprocess to install build dependencies did not run successfully.

   exit code: 1

  ╰─> [552 lines of output]

      Ignoring numpy: markers 'python_version >= "3.10"' don't match your environment

      Ignoring numpy: markers 'python_version == "2.6" or (python_version >= "3.2" and python_version <= "3.3")' don't match your environment

      Ignoring cython: markers 'python_version == "3.2"' don't match your environment

...

...

        note: This error originates from a subprocess, and is likely not a problem with pip.

      error: legacy-install-failure


      × Encountered error while trying to install package.

      ╰─> numpy


      note: This is an issue with the package mentioned above, not pip.

      hint: See above for output from the failure.

      WARNING: There was an error checking the latest version of pip.

      [end of output]


  note: This error originates from a subprocess, and is likely not a problem with pip.

errorsubprocess-exited-with-error


× pip subprocess to install build dependencies did not run successfully.

 exit code: 1

╰─> See above for output.


note: This error originates from a subprocess, and is likely not a problem with pip.

WARNING: There was an error checking the latest version of pip.


So I did a little digging and searched for necessary packages to compile and install basemap on macOS from the source. I have Python 3.9 and macOS 12.4. Here are the steps that worked for me: